Quick Start Guide
Learn how to invite your teammates to join your Jeeva AI platform and collaborate effectively on automating your sales outreach.

Gaurav Bhattacharya
CEO, Jeeva AI
Creating or Joining a Team in Jeeva
Setting up or joining a team in Jeeva is quick and easy. Follow the steps below to get started:
Step 1: Go to the Homepage
Log in to your Jeeva account and make sure you’re on the Homepage.
Step 2: Open Your Profile
Click on the Profile icon located in the top-right corner of the screen.
Step 3: Access Team Settings
From the menu, select Team from the top-left section to view team settings and manage your team.

Invite Team Members
Follow the steps below to invite teammates to your Jeeva workspace:
Enter Email Addresses
Add the email addresses of the teammates you want to invite. You can invite multiple users at once by separating emails with commas.Assign Roles
Assign the appropriate role to each team member based on their access and responsibilities.Send Invitations
Once sent, each invitee will receive an email invitation with instructions to join your Jeeva workspace.
Admin Role Assignment:
The first user to join from your company will be designated as the Admin.
Unlimited Invites:
Every user can invite an unlimited number of people to join the team.
Role Management:
Only the Admin has the authority to change roles and remove team members. If a user wants to be removed, they should ask the Admin to delete them.
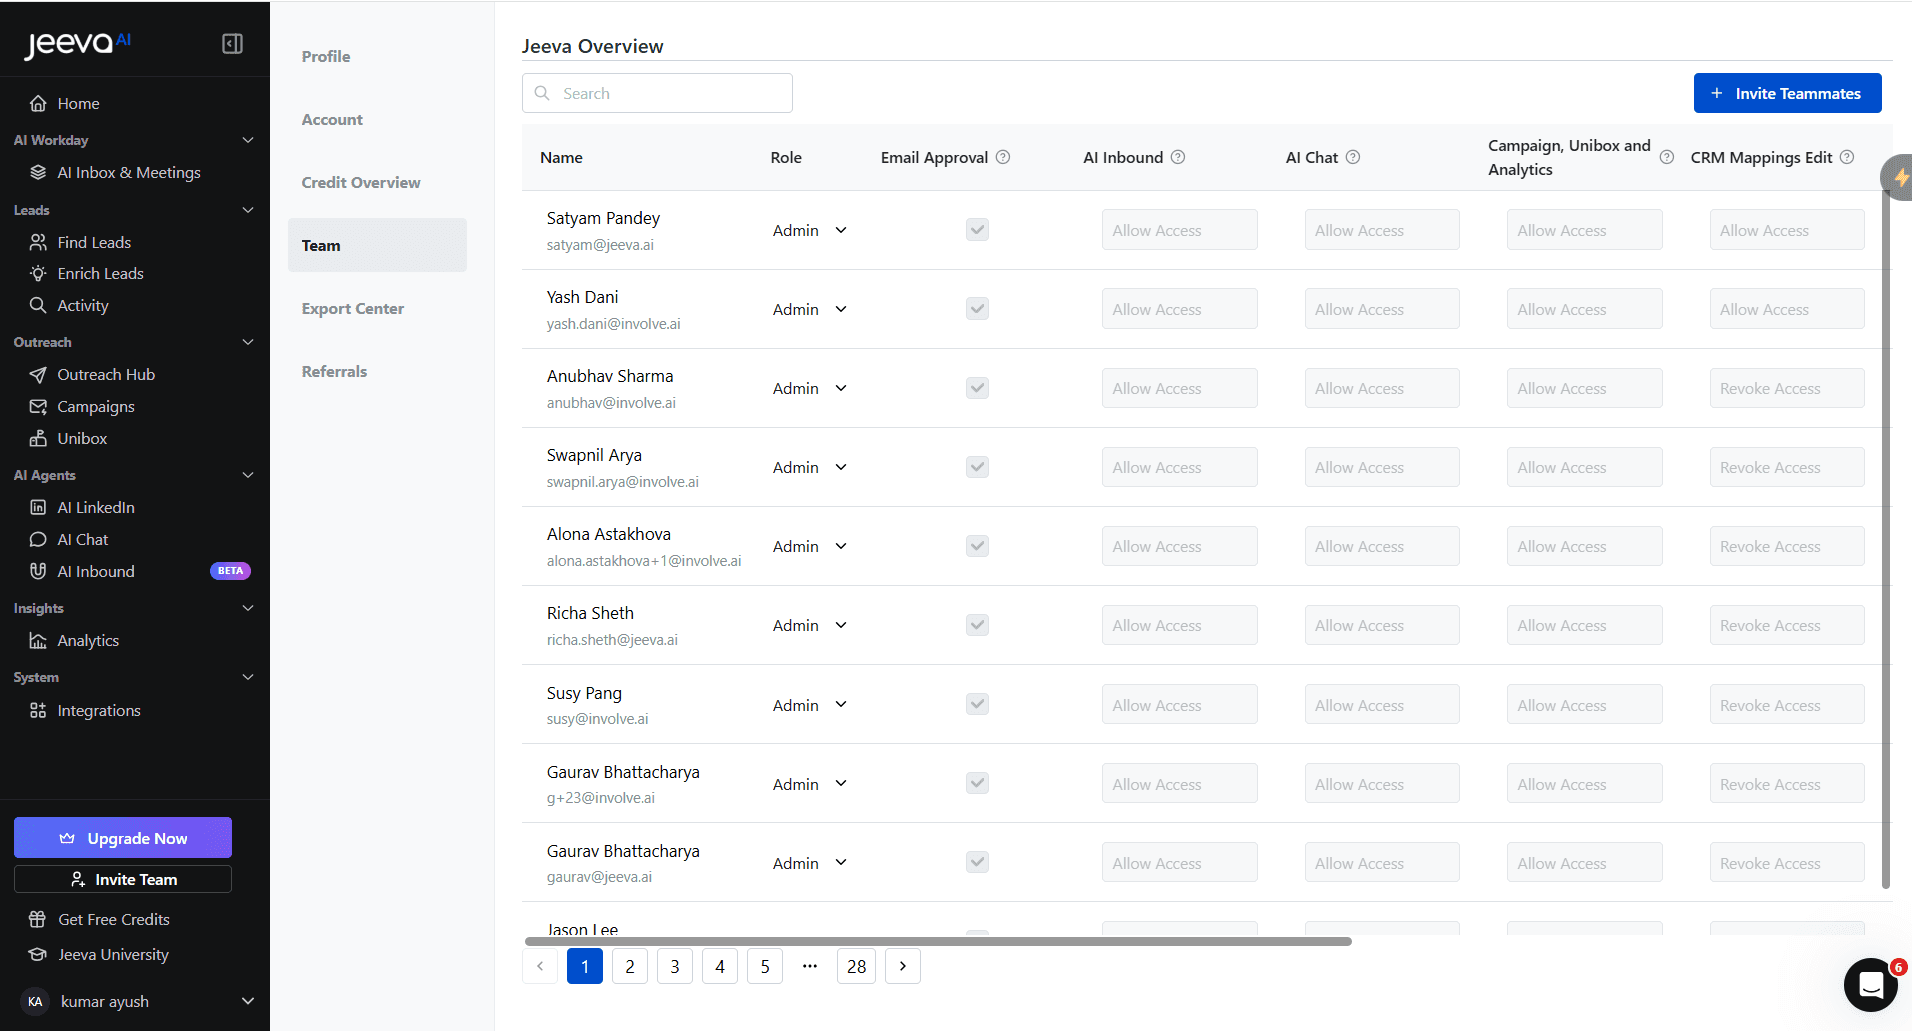
Team Permissions & Access Explained
Below is a detailed explanation of each permission available in the Team settings. These controls help Admins manage what each team member can access and configure.
Email Approved
Allows the user to approve and manage outbound communications on behalf of an Admin.
AI Inbound
Grants access to manage, qualify, and convert inbound leads using Gigi, Jeeva’s AI Inbound Agent.
AI Chat
Allows the user to configure and manage Ada, Jeeva’s AI Chat Agent, for real-time website visitor engagement.
Campaign, Unibox & Analytics
Enables the user to configure and manage Jason, Jeeva’s AI Outbound Agent.
This permission also controls access to Campaigns, Unibox, Analytics, and Hot Leads.
CRM Mappings Edit
Allows the user to configure, edit, and manage CRM field mappings and data synchronization settings.
Download
Grants permission to download data, reports, and assets from the Jeeva platform.
Access to Integrations
Allows the user to connect, manage, and control third-party integrations such as CRMs and external tools.
Summary
Creating or joining a team in Jeeva enables seamless collaboration while giving Admins full control over access, permissions, and AI workflows. By assigning the right roles and permissions, teams can securely scale their use of Jeeva’s AI agents.
That's it! You can easily create or join a team and collaborate on Jeeva.
See how fast you can book meetings when AI handles the busy work for you.