Campaign
Track active campaigns, monitor lead enrollment, and review outreach performance in real time.

Gaurav Bhattacharya
CEO, Jeeva AI
Overview
The Ongoing Campaign workflow allows you to continuously engage a defined audience using filters, uploaded lead lists, LinkedIn data, website traffic, or CRM records.
As long as new leads are available, Jeeva AI will automatically add these leads to a campaign and keep enrolling them for ongoing outreach - ensuring your engagement never stops.
If you’re wondering, “Help me create a campaign,” this guide walks you through every step - from data selection to campaign setup - so you can launch with confidence.

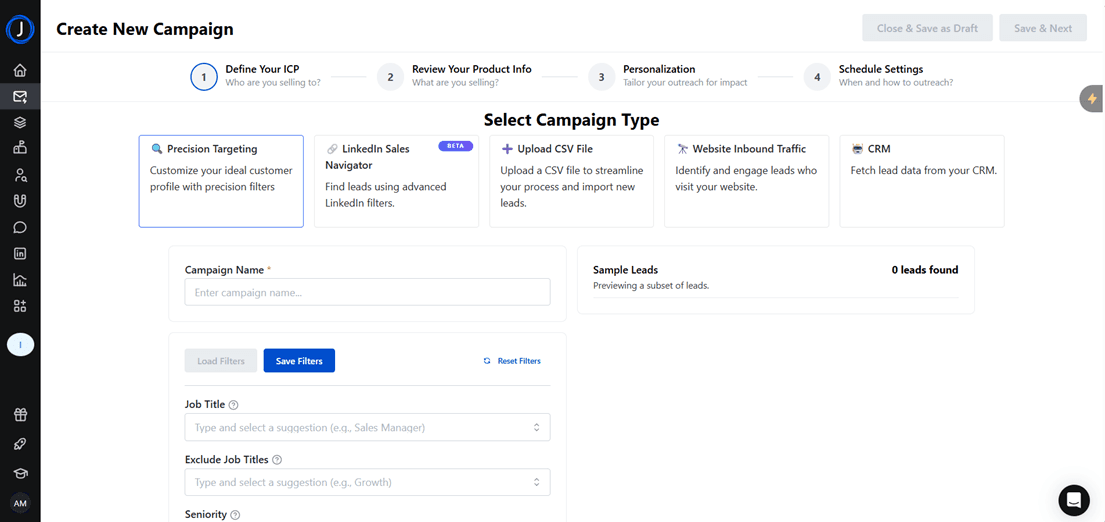
Step 1: Select Campaign Type
You can begin setting up your campaign by choosing the right data source. Each option is designed to match how you store or collect your leads:
Precision Targeting
Build your campaign audience from scratch by applying detailed filters. You can define your Ideal Customer Profile (ICP) using:Job Title (e.g., Sales Manager, VP of Marketing)
Seniority (e.g., Director, C-Level)
Company Size (e.g., SMB, Mid-Market, Enterprise)
Industry (e.g., SaaS, Manufacturing, Finance)
Geography and other firmographics
This ensures you’re reaching only the prospects who best fit your ICPPro Tip: Once your ICP is ready, set up an email + LinkedIn campaign or create a new LinkedIn automation to engage these leads across multiple touchpoints for maximum conversion.
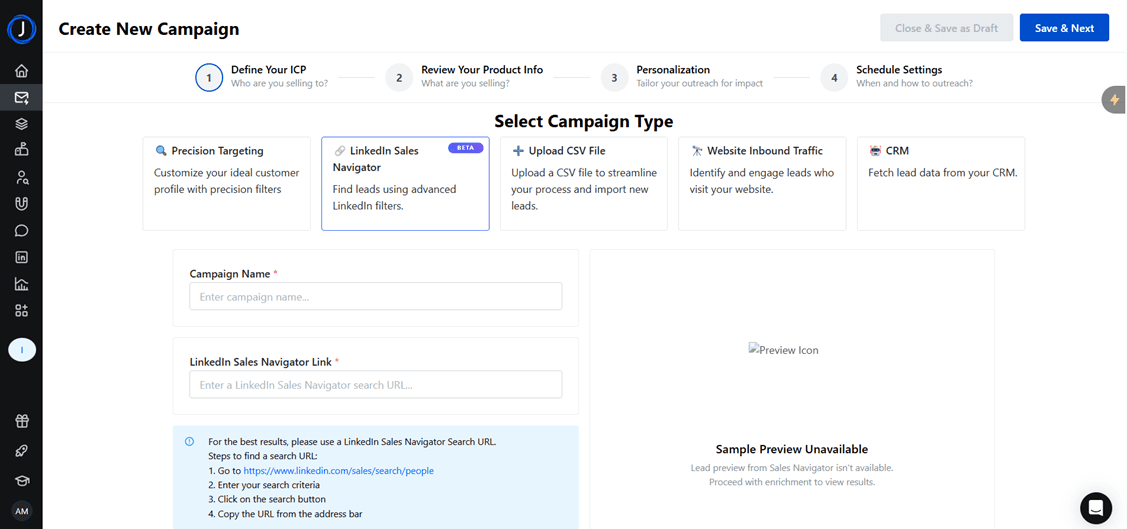
LinkedIn Sales Navigator
Use advanced LinkedIn Sales Navigator searches to find highly relevant leads.Perform your search inside Sales Navigator.
Copy the search URL from your browser.
Paste it into the field ‘LinkedIn Sales Navigator Link’ to pull those filtered leads into your campaign.
This is ideal if you’re already using Sales Navigator for prospecting and want to plug it directly into your workflow.
Upload CSV File
If you already maintain lists of leads, you can import them directly:Prepare a CSV file with lead details. Mandatory fields are Name or First Name & Last Name, Company, and Email address. LinkedIn URL is optional but recommended.
Upload the file.
The system will process and map the fields automatically.
This option saves time and ensures that your existing lists are immediately actionable.
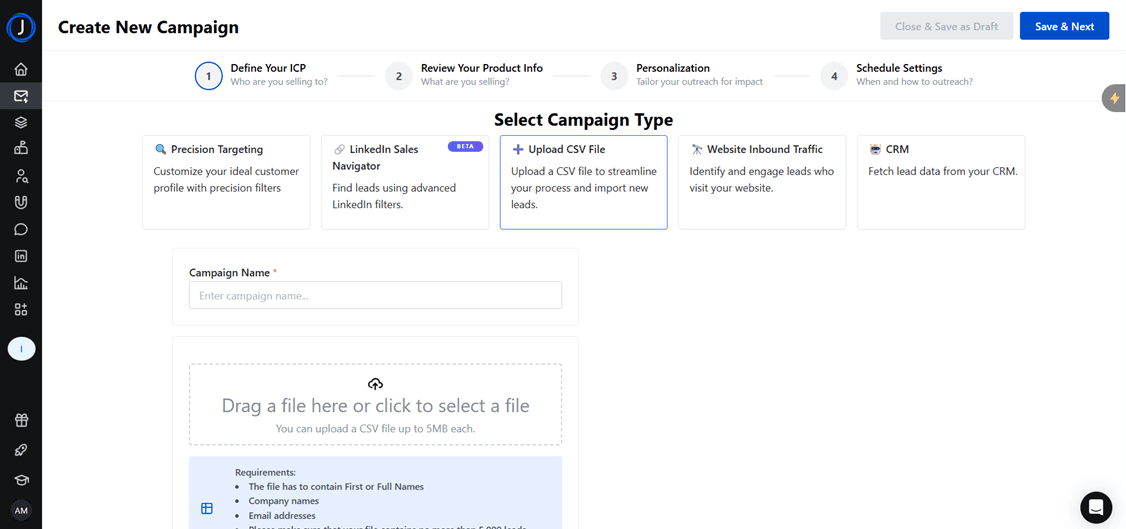
Note - a list of 5000 leads can be uploaded at once
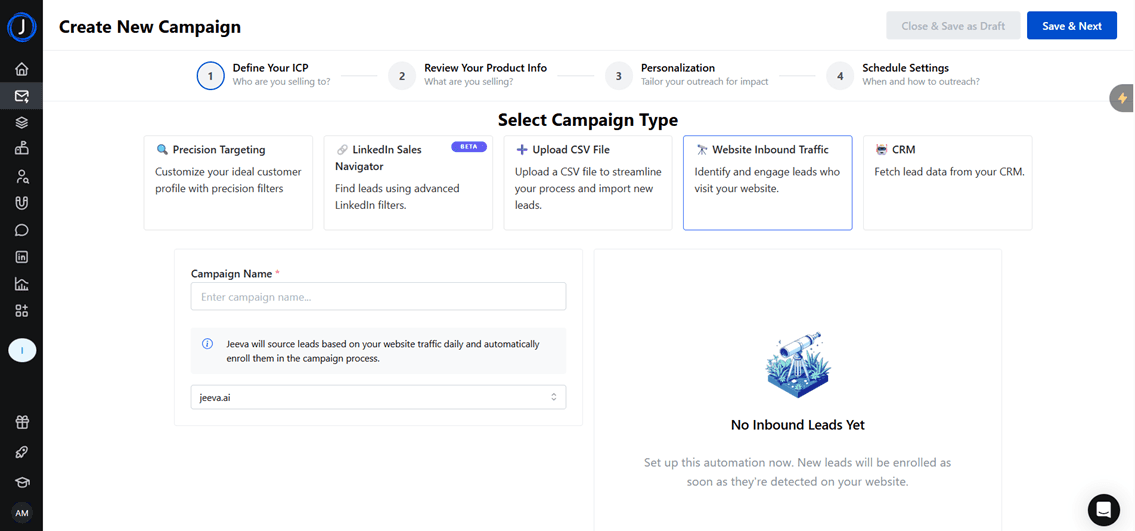
Website Inbound Traffic
Convert your website visitors into active leads:Jeeva AI identifies inbound traffic on your site.
Visitors are automatically enrolled in your campaign once detected.
This is useful for capturing warm, intent-driven leads who are already engaging with your brand.
CRM
Connect your existing CRM (e.g., Salesforce, HubSpot, Zoho) to sync lead data:Jeeva AI fetches prospects directly from your CRM records.
Data stays updated automatically, with new contacts added to your campaign in real time.
This ensures consistency between your sales database and campaign outreach.
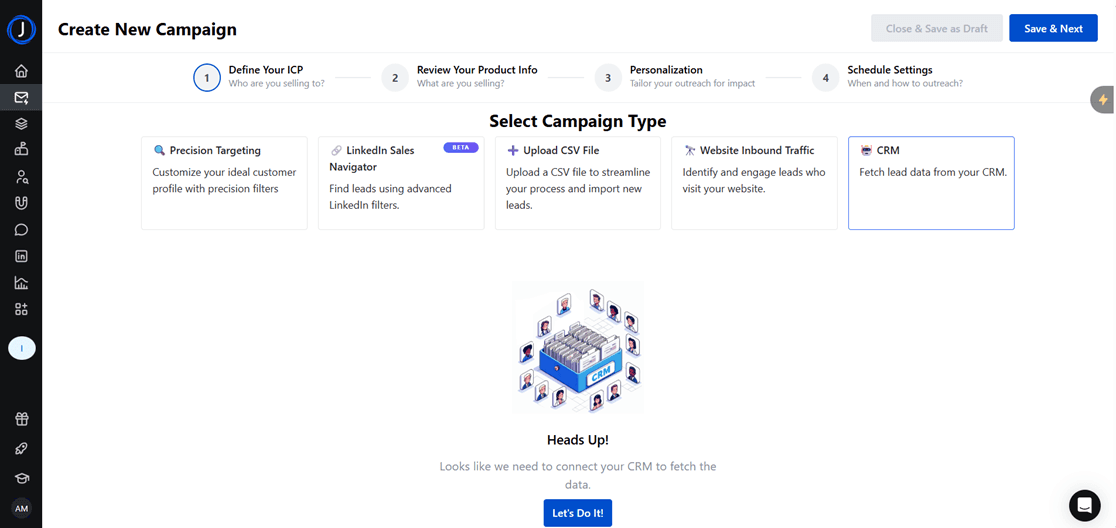
After choosing your campaign type, you’ll proceed to set up the campaign (defining product info, personalizing outreach, and scheduling sends).
Prerequisite - You need to have a list created in your CRM that can be selected in Jeeva.
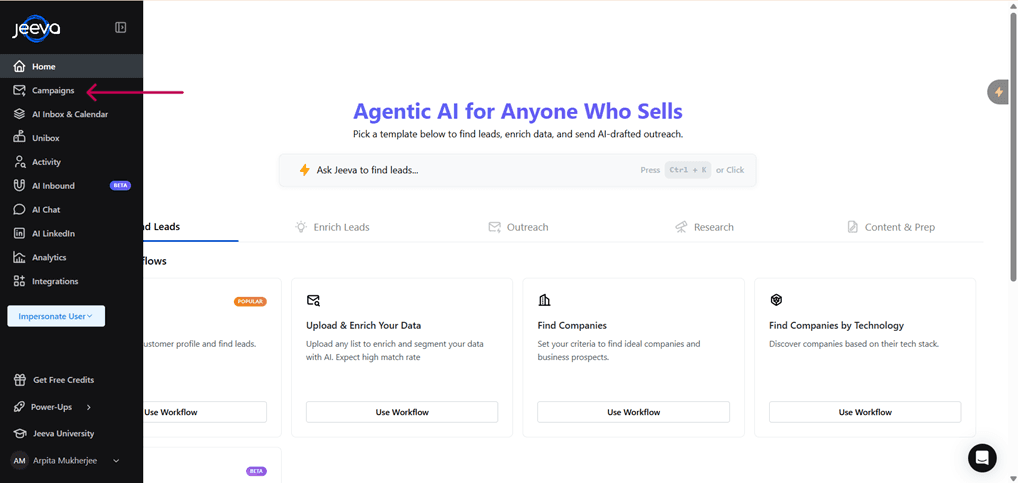
How to check campaign status
Navigate to Campaigns
From the left-hand menu, click on Campaigns.
This will show you all campaigns grouped under tabs like Ongoing and Outbox.
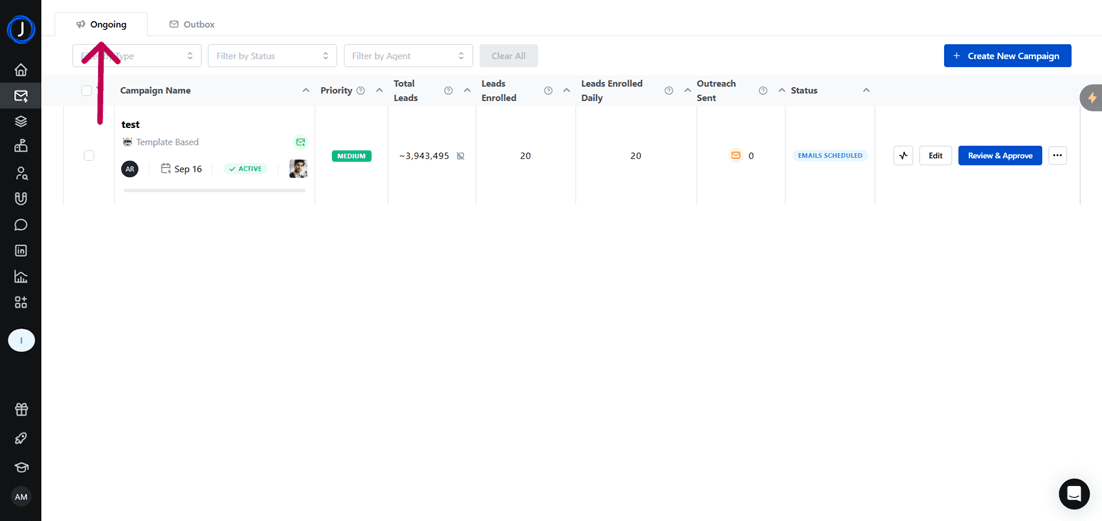
Campaign Overview (Ongoing Tab)
In the Ongoing tab, you’ll see key details for each campaign: All the previous campaigns, the ongoing campaigns and the campaigns which are in progress i.e. the draft campaigns.
Campaign Name & Type (e.g., Template Based, AI-Crafted, DIY).
Priority (Low, Medium, High).
Total Leads (how many leads are linked).
Leads Enrolled (total added).
Leads Enrolled Daily (per-day volume).
Outreach Sent (number of messages delivered).
Status (e.g., Active, Paused, Scheduled).
Campaign Overview (Outbox Tab)
The Outbox tab shows:
All enrolled leads in the campaign.
Emails or LinkedIn drafts generated by Jeeva.
Each lead’s status (e.g., Waiting for Approval, Approved, Sent).
An option to Review drafts before sending.

Step 2: Set Up the Campaign
Once you choose your campaign type, the next steps include:
Reviewing your product info so the AI can tailor outreach messaging.
Personalization of campaign steps to ensure high engagement.
Schedule settings to determine when and how outreach happens.
✅ Tip: If you’re unsure which option to start with, use Precision Targeting or LinkedIn Sales Navigator for the fastest way to define and engage your ICP.
Once your list is ready, simply add these leads to a campaign to launch personalized outreach and start converting prospects right away.
See how fast you can book meetings when AI handles the busy work for you.